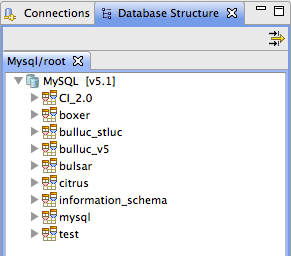
Using Aptana is great but having to constantly switch to PhpMyadmin to check Mysql table structures can be tiring (even if [CMD + TAB] or [CTRL + TAB] makes it a bit easier). It may then be useful to configure a MySql connection in Aptana.
This post will tackle the configuration on Mac OSx 10.6 with MAMP installed. But you could easily configure Aptana the same way on LAMP (Linux) or WAMP (Windows) platforms.
Therefore, you’ll need the MySql Connector/J driver that can be found on http://www.mysql.com/downloads/connector/j/. Download and unzip it in the /Mamp/Library/share/Mysql/Connectors/ folder.
1. Install Sql Explorer plugin in Aptana
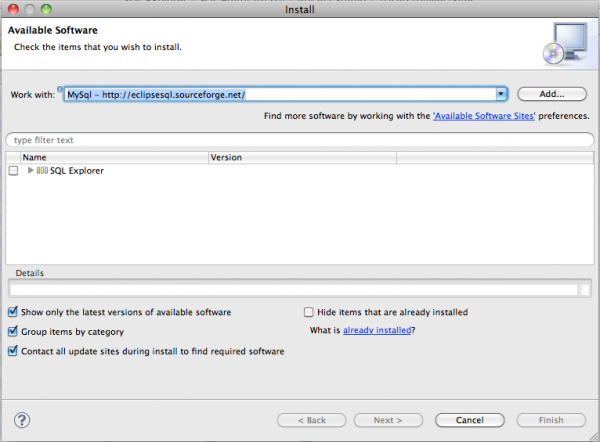
First, you’ll need to install the Sql Explorer plugin for Aptana : Select Menu Help / Install Software, then click “Add” to add a site for the plugin install. Give it a name (MySql) and the following location : http://eclipsesql.sourceforge.net/
Then select your newly created source site from the combo box and tick “SQL Explorer” before clicking the “finish” button :
2. Create a MySql connection
Open Aptana and select Menu Window / Open perspective / Other / SQL Explorer. Then select Menu Window / Showview / Connections to create a new connection to Mysql :

Click on the “Create new connection profile” button to configure the MySql driver : ![]() to display :
to display :
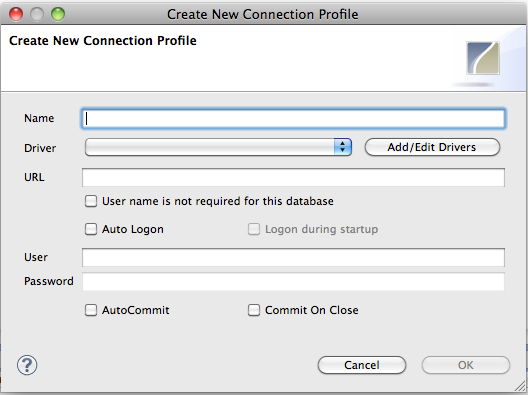
Give a name to your connection : Mysql
Then click on “Add/Edit drivers”, then expand the “SQL Explorer” from the left menu and click on “JDBC Drivers” and select “MySql Driver”:
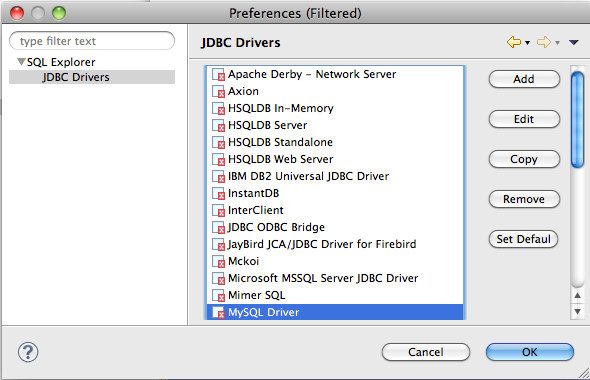
Then click the “Copy” button to edit preferences on a copy of the item and give your driver a new name (My MySql driver) :
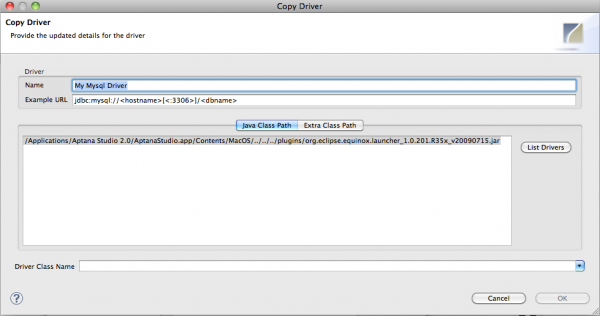
Edit the example URL as follows :
jdbc:mysql://localhost:3306/
You still need to change the port since port 3306 is the default MySql connection port. Open MAMP and click Preferences / Ports :
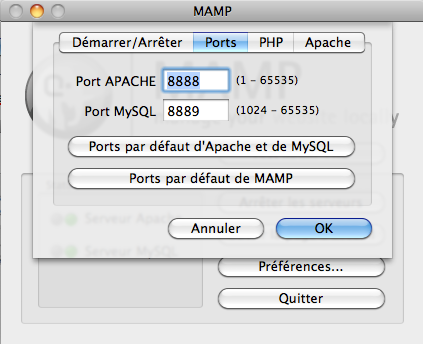
then change the MySql driver example URL :
jdbc:mysql://localhost:8889/
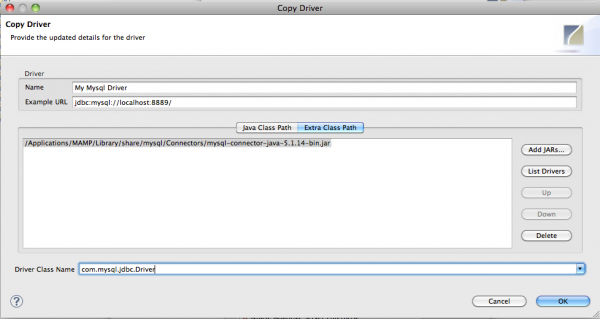
Then click the “Extra class path” button to add the MySql Connector/J driver (file mysql-connector-java-5.1.14-bin.jar) that is to be found in /Mamp/Library/share/Mysql/Connectors/.
and fill in the Driver class name as follows :
com.mysql.jdbc.Driver
Your driver preferences dialog should look like this :
Then click “OK”. Aptana now shows your driver as being correctly configured :
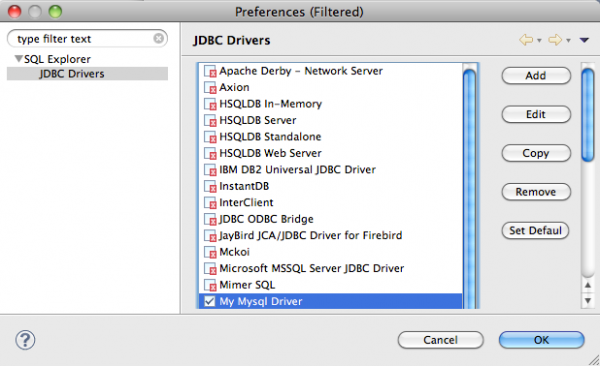
Click “OK” to select “My MySql Driver” for the present connection.
In the “Create new connection profile” dialog, select the newly created Mysql driver (My Mysql Driver) from the combo box. Tick “auto logon” and type the MySql root username and password :
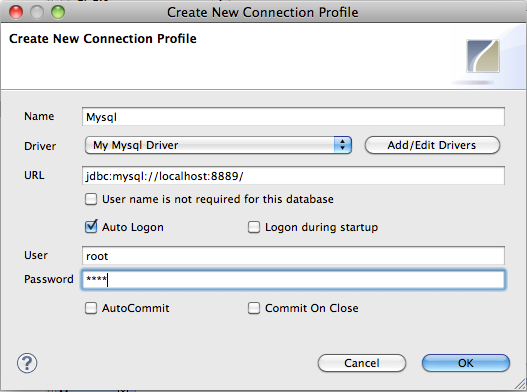
and click “OK”. Your Connection is now ready :
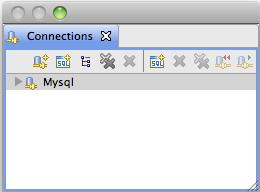
Right click your “Mysql” connection to view database structures :
